

Flowcharts are the perfect tools for visualizing the exact steps of any workflow, no matter how simple or complex.
But designing flowcharts can be a challenge, especially if you’ve never done it before.
We’ve written before about the importance of flowcharts because we truly believe that they’re one of the best ways to stay organized, yet we know that many still struggle to create effective flowcharts.
Last year, we added the Flowchart Extension in an effort to simplify the process even further.
The Flowchart Extension automatically generates a flowchart based on your workflow steps and gives you the ability to customize, rearrange, and organize your workflows in a visual format.
Here’s what you need to know about using the Flowchart Extension to create easy-to-use flowcharts for any workflow.
Creating Your Workflow in Gravity Flow
Since the Flowchart Extension is a visual representation of your workflow steps, you will need to create your workflow using Gravity Flow and Gravity Forms.
But before you start building steps in Gravity Flow, it’s important to write out a list of the necessary steps first, so nothing is missed. This includes any feedback loops, approval steps, and user roles.
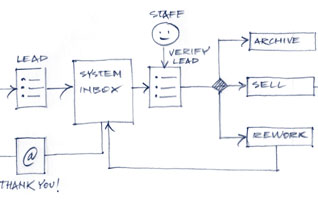
You can write out steps on a piece of paper as a bullet-pointed list, or sketch out the steps in a rough flowchart map using paper, sticky notes, or computer software (here are tips for creating a workflow map or diagram as part of your initial workflow creation).
The steps to creating a basic workflow are as follows:
- Define your workflow’s objectives — What should the end goal of the workflow accomplish?
- Create a list of necessary steps — What steps are required to achieve your objectives? Write out steps both big and small. Steps may include inputs (document creation, materials gathered, etc.), processing steps (approvals, edits, product development, etc.) and outputs (PDF document creation, items created, mail or emails sent, etc.).
- Add feedback loops — If one step fails to be accomplished, what happens? Does it loop back to the previous step for approval? Make notes of any steps that require approval, changes, edits, or completion before another step can be accomplished. In a rough workflow map, these loops are defined with simple arrows or illustrations
You can find more about organizing your workflow here.
Once you understand the steps required in your workflow, you can start building those steps in Gravity Flow.
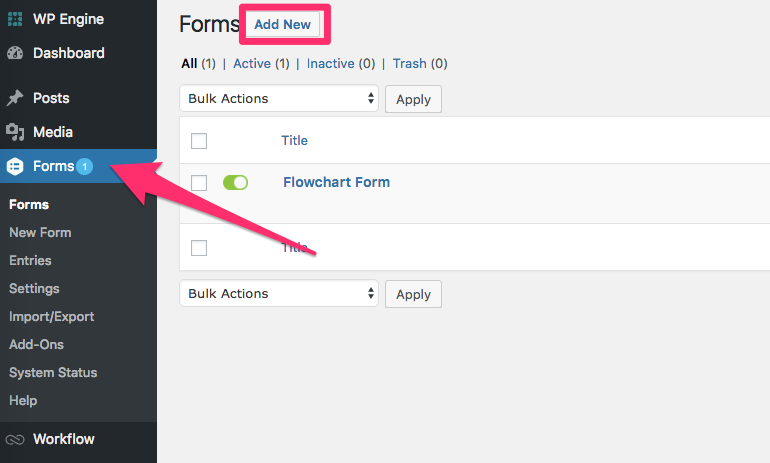
In your WordPress dashboard, navigate to Forms > Add New
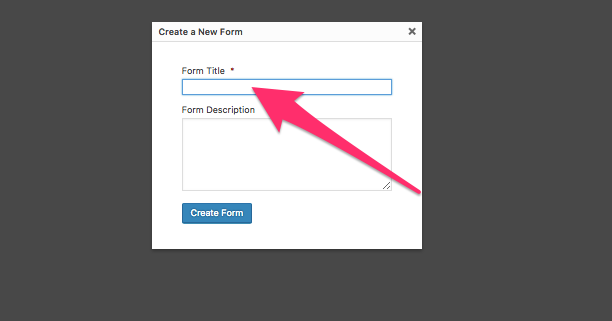
Name your form and provide an optional description. You can create a fully-functional form at this point or come back to it later.
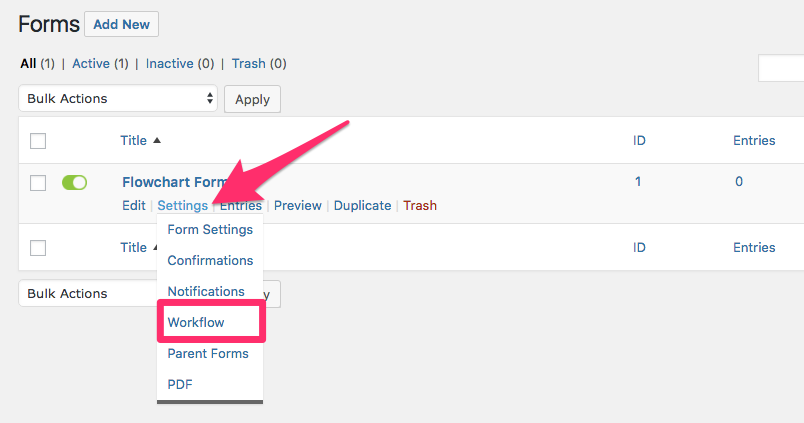
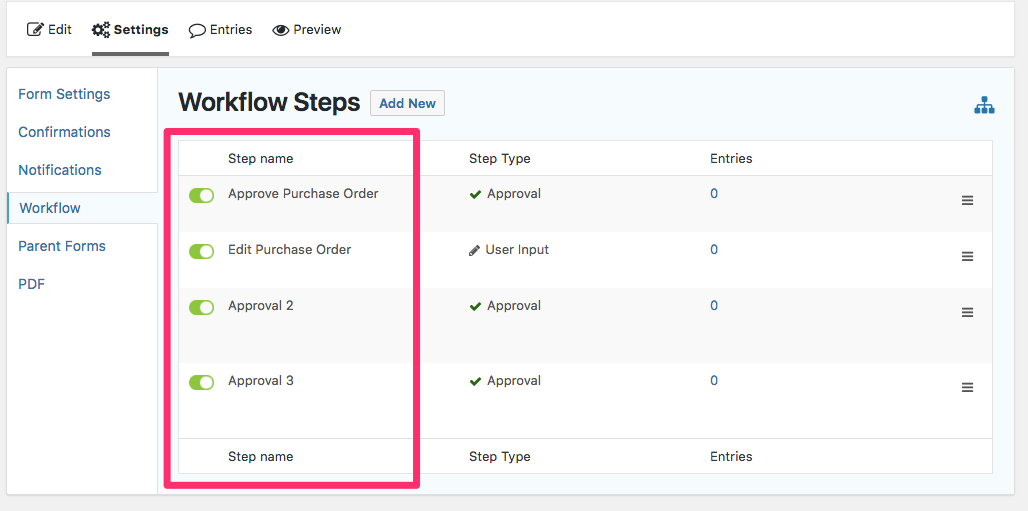
Once your form is created, go back to Forms and below your new form select Settings > Workflow.
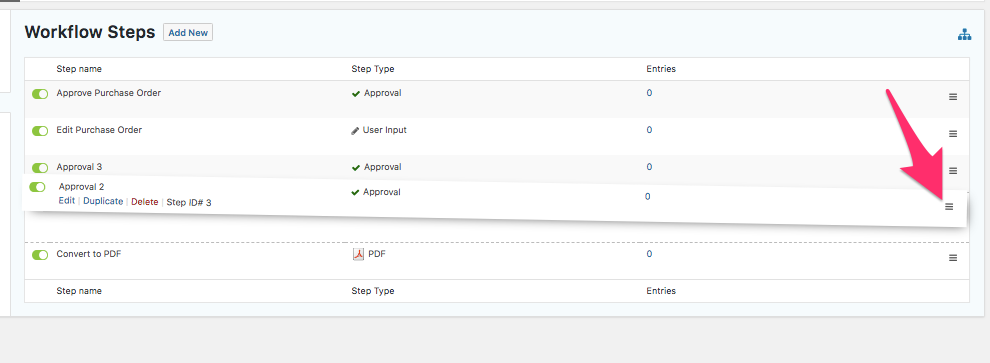
This will bring you to the workflow step creation section. From here, you will be able to add the steps from your workflow list as steps in Gravity Flow
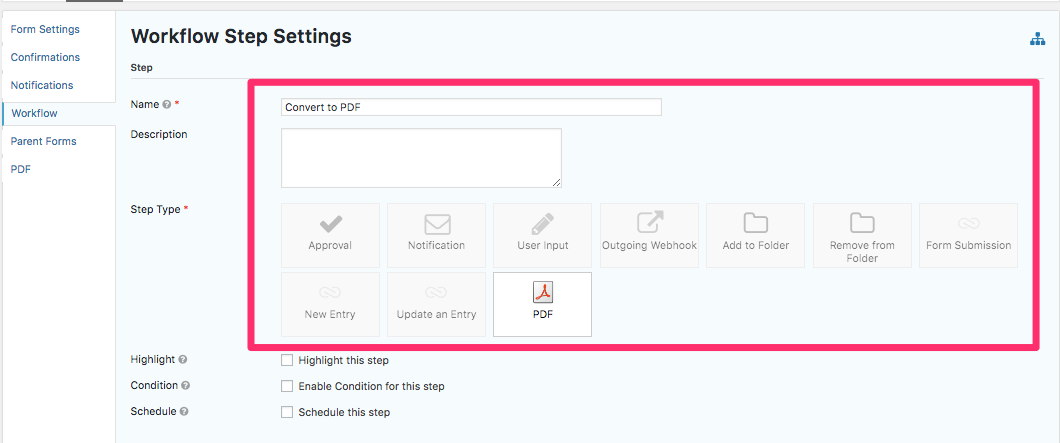
If you’re not sure how to create specific steps (approvals, user inputs, etc.) be sure to read our user guides for creating steps. The more complicated the workflow, the more steps will be required, so make sure they’re optimized and well organized.
Once your workflow steps are in place, the flowchart design process is fairly straightforward.
Designing Workflows using the Flowchart Extension
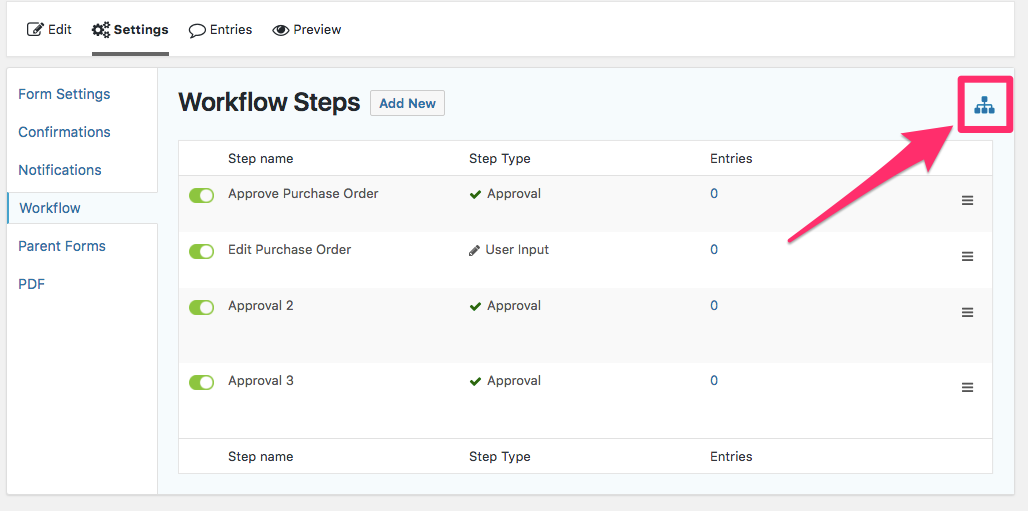
In the workflow steps section, click the flowchart button in the upper right-hand corner to see your new flowchart.
Here’s an example of what you might see (based on the workflow steps in the image above).
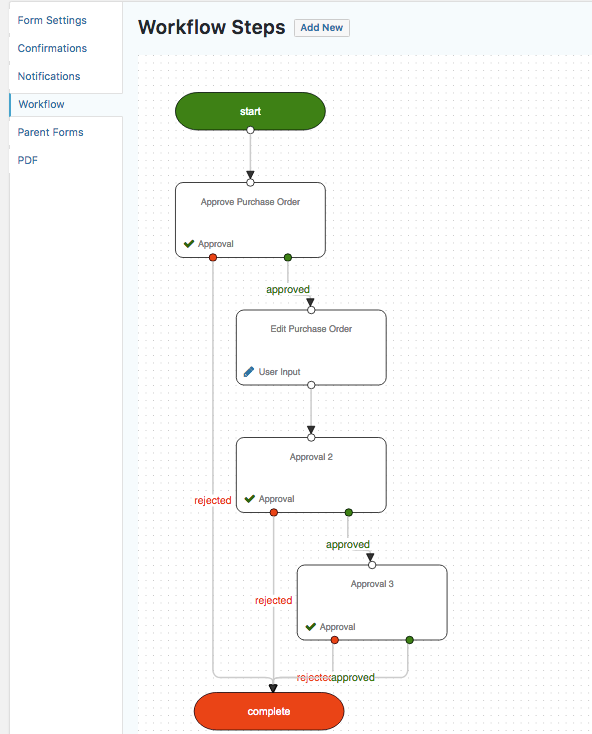
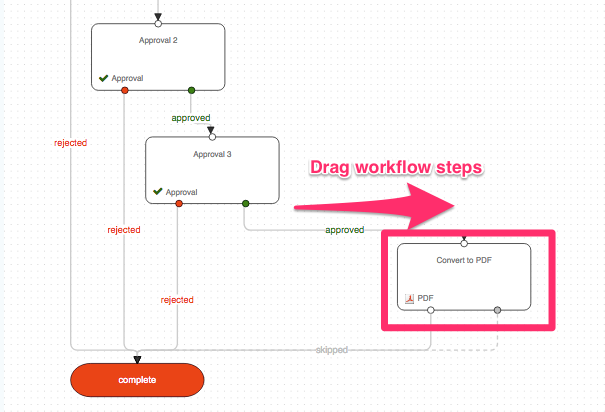
In a simple workflow like this, you’ll see the basic flow indicated by black arrows and any approval/rejection steps indicated by gray lines and red/green text.
If you had a more complicated workflow, you might see other lines or indicators depending on your feedback loop.
If, for example, one of your steps required additional approvals or additional steps (branching steps) before being able to move on to the next step, you would see those gray lines and boxes displayed automatically in the flowchart extension.
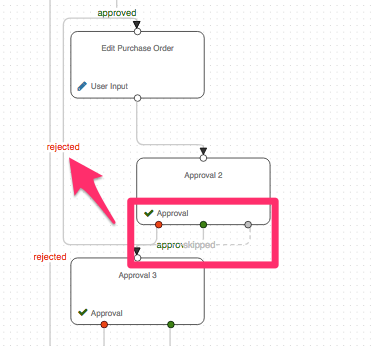
You can add feedback loops to any step by clicking on it within the flowchart view. Click To Tweet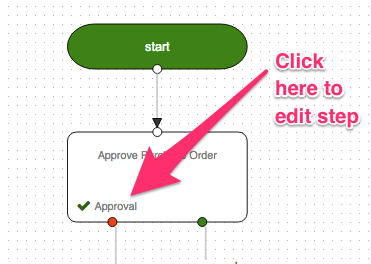
If you need to add additional steps to your workflow at any point, you can select Add New from the top of the flowchart view as well.
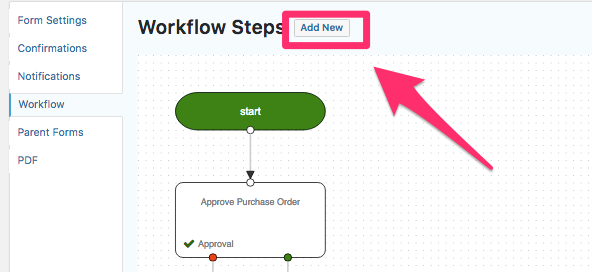
This would bring you to the step creation section, where you can add any steps you want.
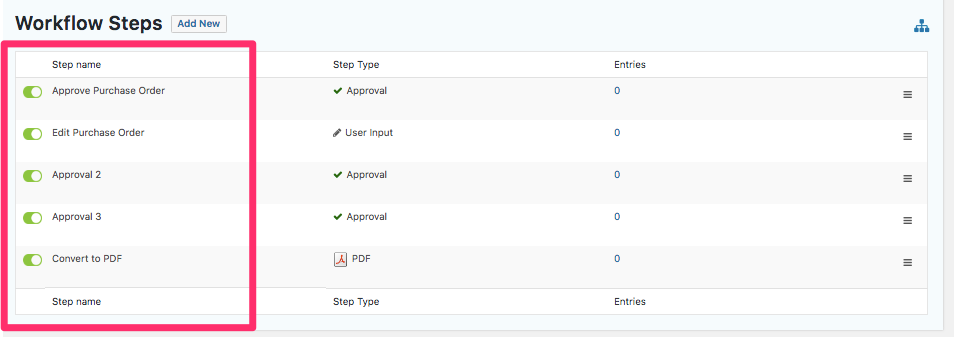
Once your new step is completed, you will be given the option to go back to your list of workflow steps, add more steps or see your revised workflow.

Clicking on “Back to the list” will show you any new steps you’ve created during this process.
You also have the option to rearrange steps by dragging-and-dropping them in any order.
Clicking on the flowchart button will show you any changes made to your workflow.

If you want to change how the flowchart looks, you can also drag-and-drop boxes in any direction within the flowchart view.
This includes any lines attached to those boxes.
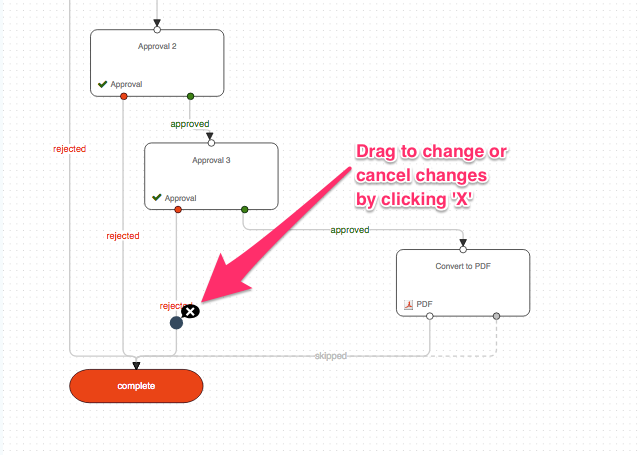
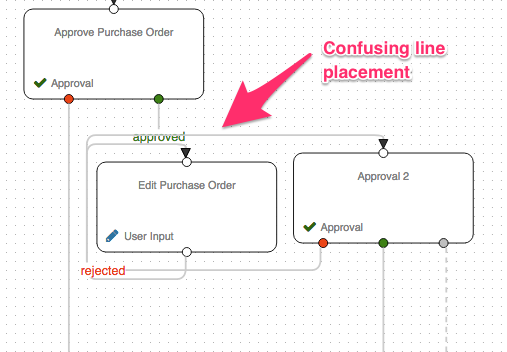
Just be careful of where you drag certain boxes, as the lines are designed to keep your workflow in order and may appear more confusing depending on where those boxes sit in your flowchart.
Here’s an example of a good drag-and-drop placement:
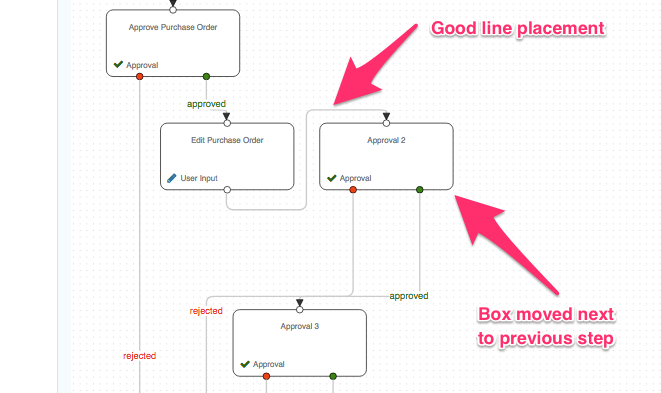
And a bad drag-and-drop placement:
Workflow steps can be added, changed or removed at any time and the flowchart extension will generate a new flowchart based on your steps.
Here’s another example of a workflow flowchart used by one of our clients to show you just how much you can do with your flowcharts based on the steps you create and the way you design it visually.
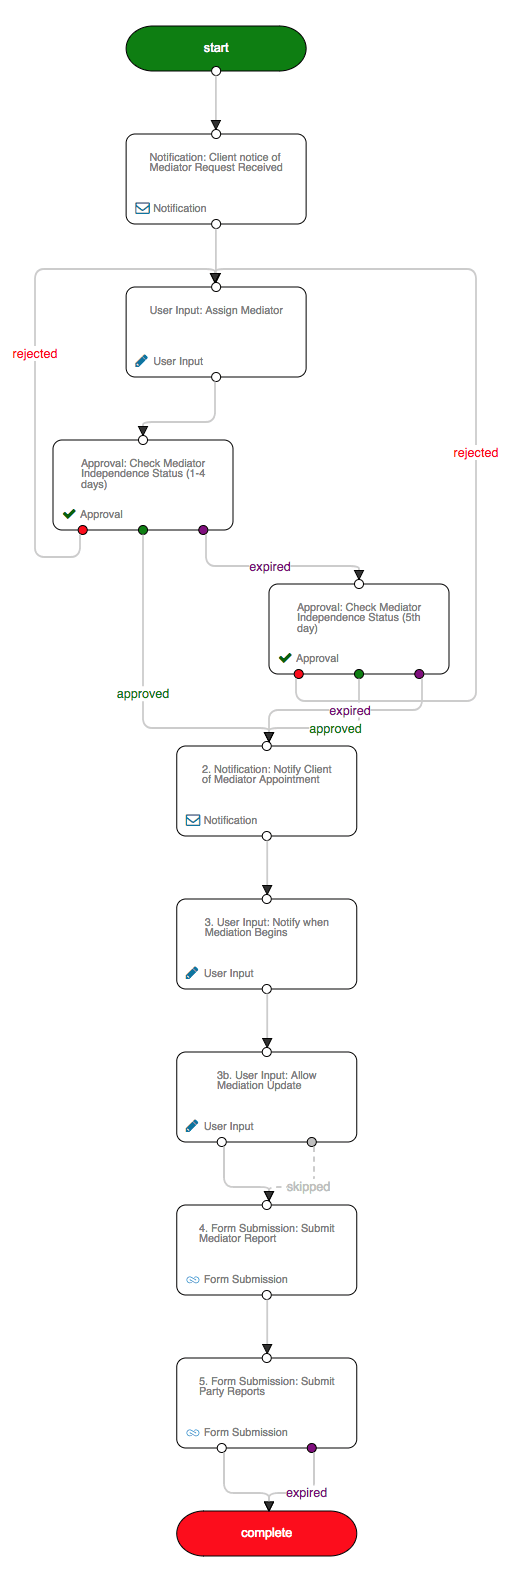
They were able to save time and double their productivity by adding a flowchart in Gravity Flow.
Keep in mind that if you make any changes to the workflow steps, you may lose any customized drag-and-drop design elements from your new chart. So wait until the very end of the process to make visual changes in the flowchart view.
And that’s it!
Adding a flowchart using Gravity Flow’s Flowchart Extension is fairly straightforward. Simply click the flowchart button to see your creation and make any necessary edits using the workflow steps section.
Once your flowchart is created, you can test it out by running through the process and make any changes as necessary to fully optimize your workflow.
Final Thoughts
Adding a flowchart using the Flowchart Extension is easy, but remember that it will be entirely reflective o how well you set up your workflow steps.
For more information on optimizing your workflow steps or creating complex workflows, check out our basic guide for using Gravity Forms as a workflow tool or, if you’re a developer, check out our documentation on workflow step creation.
Remember that practice makes perfect. The more time you spend creating steps and designing your flowcharts (both before and after using Gravity Flow), the better you will become.
And, in turn, the better results you’ll see from your workflow.
