
Did you know that companies that excel at drip campaigns experience a 119% increase in click rate from drip emails?
Drip content is mostly used in marketing to create highly effective campaigns for businesses that want to promote their content without pushing advertisements in their audience’s face.
It’s used for gradual, long-term marketing efforts that help improve conversions while ensuring you’re not coming off as “too pushy”. Done right, it can help businesses increase conversions while offering an enhanced user experience.
In this article, we’ll explore the concept of drip content marketing, how it’s used, its benefits, and how you can implement it on a WordPress site.
What is drip content?
Drip content is a series of content pieces that end-users are slowly given access to instead of all in one go.
In simpler words, you “drip” pieces of content to your audience gradually over time. This way, they don’t have access to all of your content pieces at once. Instead, they will receive content pieces over time according to your drip feeding strategy.
Dripping content is a great way to nurture and convert leads over a period of time. As a result, it can help improve customer retention and increase customer loyalty over a period of time.
Where is drip content used?
Let’s take a look at a few examples of how drip-feeding content can be used for different businesses:
#1: Membership sites
Drip content works perfectly with membership sites as content can be broken down and shared in parts exclusively with paying members only. This is a great way for affiliate marketers and communities to create an additional source of monthly income.
If you’re looking for a way to drip content only, you can use a content dripping plugin instead of a full-fledged WordPress membership plugin. You can set it up to drip content to selected membership levels over a period of time or on a specific date. Members who have subscribed to the membership level or membership plan will be able to access the new content. Any new members that join the program will only have access to the first lesson.
#2: E-Courses
Online courses are a great way to create and share lessons with your students. If you’re a course creator or a teacher, you can implement a content dripping campaign by creating and sharing lessons with students one by one, rather than giving them access all at once.
This way, they’re more likely to complete the entire course content and stay engaged with your program throughout the course duration.
#3: Conversion-based Email marketing
There are many ways to use drip content for email marketing and e-commerce sites including:
- Email course campaigns
You can create, nurture, and convert leads by sharing content that adds value and teaches or shares useful insights with them. For instance, an antivirus software company may create a course about online security that teaches people about the do’s and don’ts of online safety while plugging in their antivirus software. - Cart abandonment campaigns
You can reduce the number of carts abandoned on your WooCommerce store by creating targeted content dripping campaigns. You can re-engage and convert site visitors who have previously shown interest in buying your product through a targeted email campaign.
How to add drip content in WordPress
Since WordPress by default doesn’t offer built-in functionality that lets you easily add a drip feature to your site, the most convenient way to add drip content is to use Gravity Flow.
Gravity Flow is an all-in-one solution for automating custom workflows for your business.
This means that you can create drip content campaigns easily and view the workflow in an easy-to-read map interface. Gravity Flow is incredibly intuitive. All you need to do is create a new Gravity Forms form and add your custom workflow steps to it.
With Gravity Flow, you can create a fully functional drip content campaign within a few clicks.
Gravity Flow simplifies the creation of custom workflows while also offering extensive customizability and flexibility. The best part about the plugin is that it can be used by anyone, no technical knowledge is required.
Gravity Flow is a “one-off” solution that helps businesses automate important processes to save time, labor, and money. It helps create robust customized workflows that can be used to sell courses, products, and services better. In addition to this, Gravity Flow will help you organize data better and streamline processes for your business.
Adding drip content in WordPress using Gravity Flow
Here, we’ll show you step-by-step how you can use Gravity Flow to add drip content in WordPress. For this tutorial, you’ll need a WordPress site along with the Gravity Flow and the Gravity Forms plugins.g
Gravity Flow builds on top of Gravity Forms. So, you need to have the Gravity Forms plugin installed and activated on your WordPress site.
Step #1: Download and install Gravity Flow
First things first, make sure you already have the Gravity Forms plugin installed and ready to go on your WordPress site. Now, get the Gravity Flow plugin and navigate to Plugins → Add New to install it on your WordPress website.
Click on the download link provided in the purchase confirmation email and upload the .zip file to the plugin’s upload screen. Once you’re done, activate the plugin on your WordPress site.
Step #2: Create a workflow
Now with both plugins – Gravity Flow and Gravity Forms – installed and activated on your WordPress site, you can start creating a custom workflow.
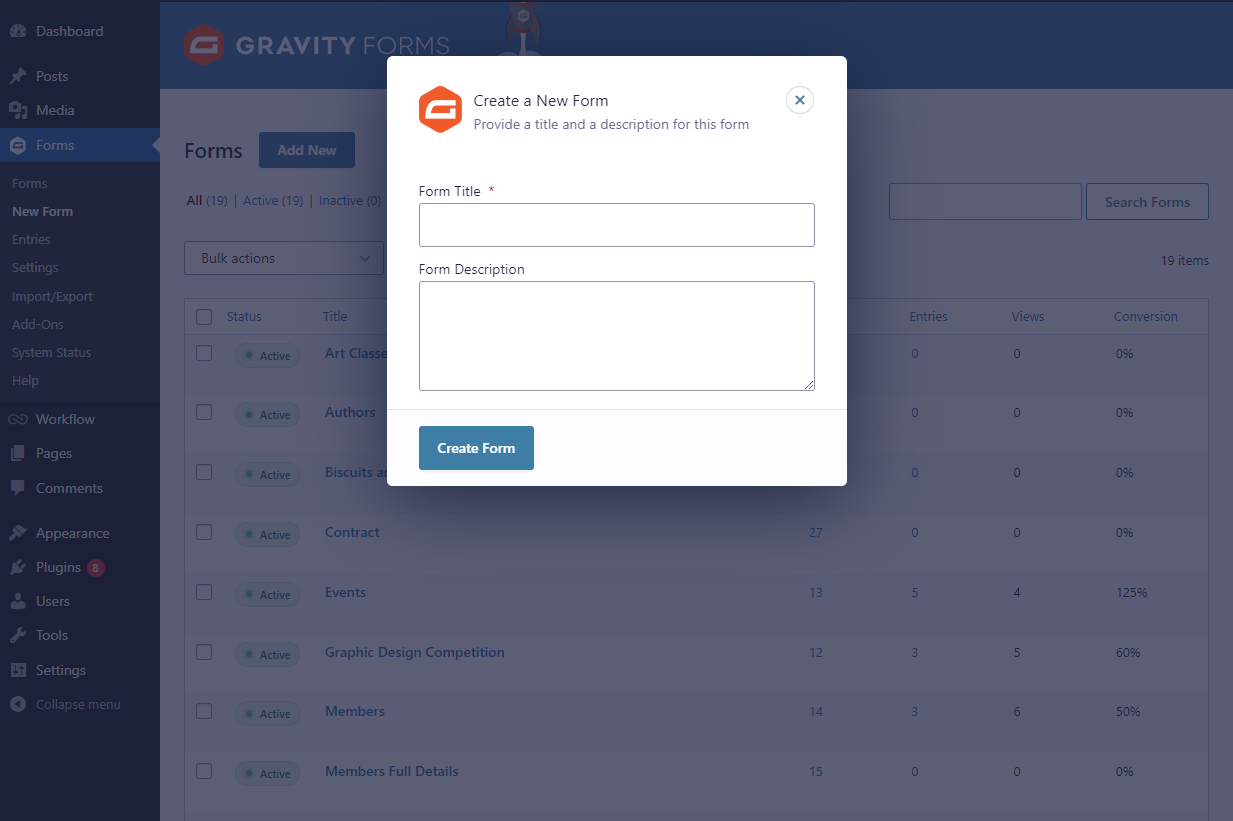
Start off by creating a new form by navigating to Forms → New Form from the WordPress dashboard.
Add fields to your form via the form editor – including an email field will be an important one to include.
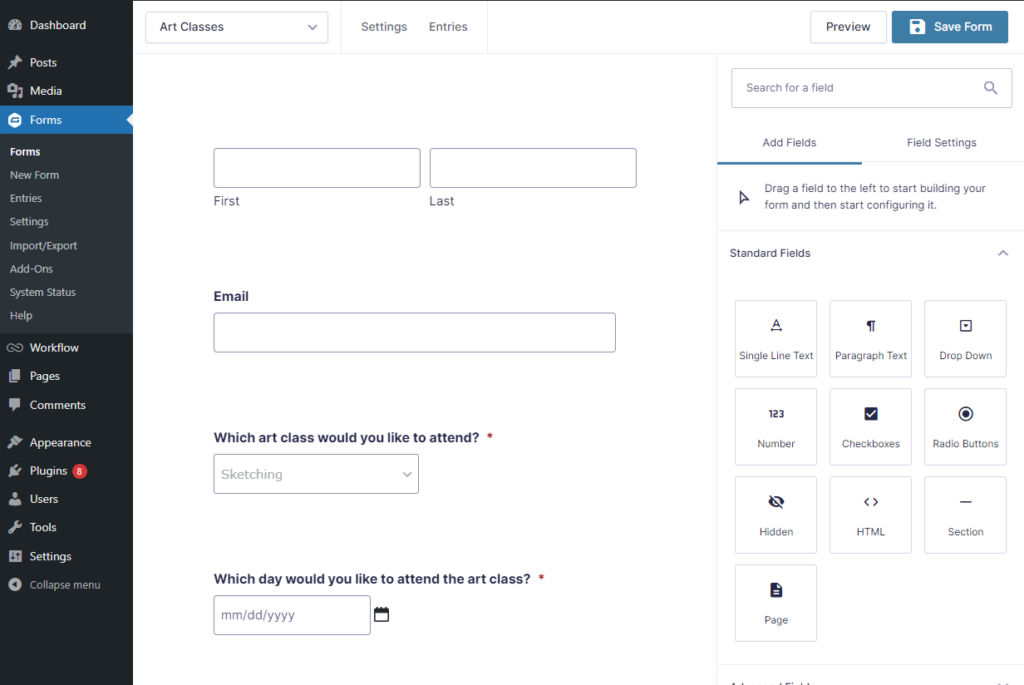
Once you’re ready, make sure to click on the Save Form button. Now, with the form created, you can move on to creating a new workflow for it. To do this, simply hover your mouse over the Settings section at the top and select Workflow.
Click on the Add New Step button to start creating your drip content campaign.
Step #3: Configure workflow settings
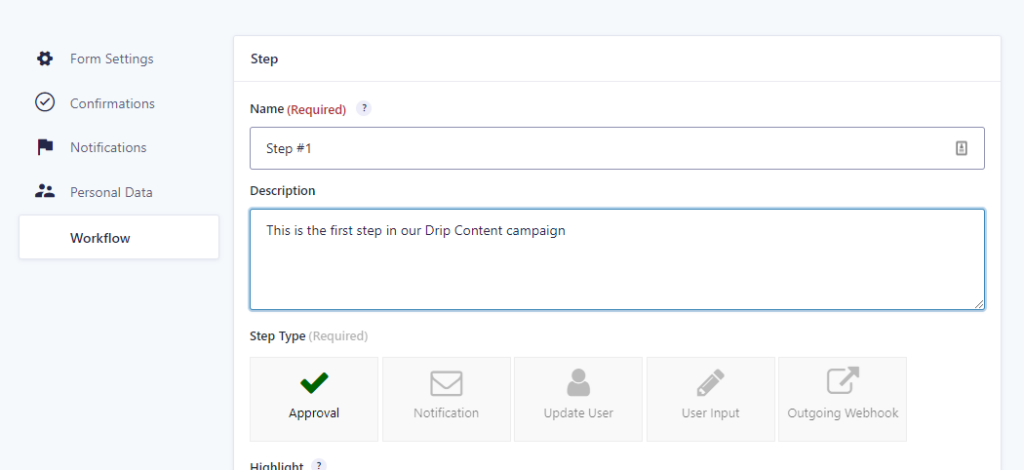
To get started, give your workflow step a new name and a short description.
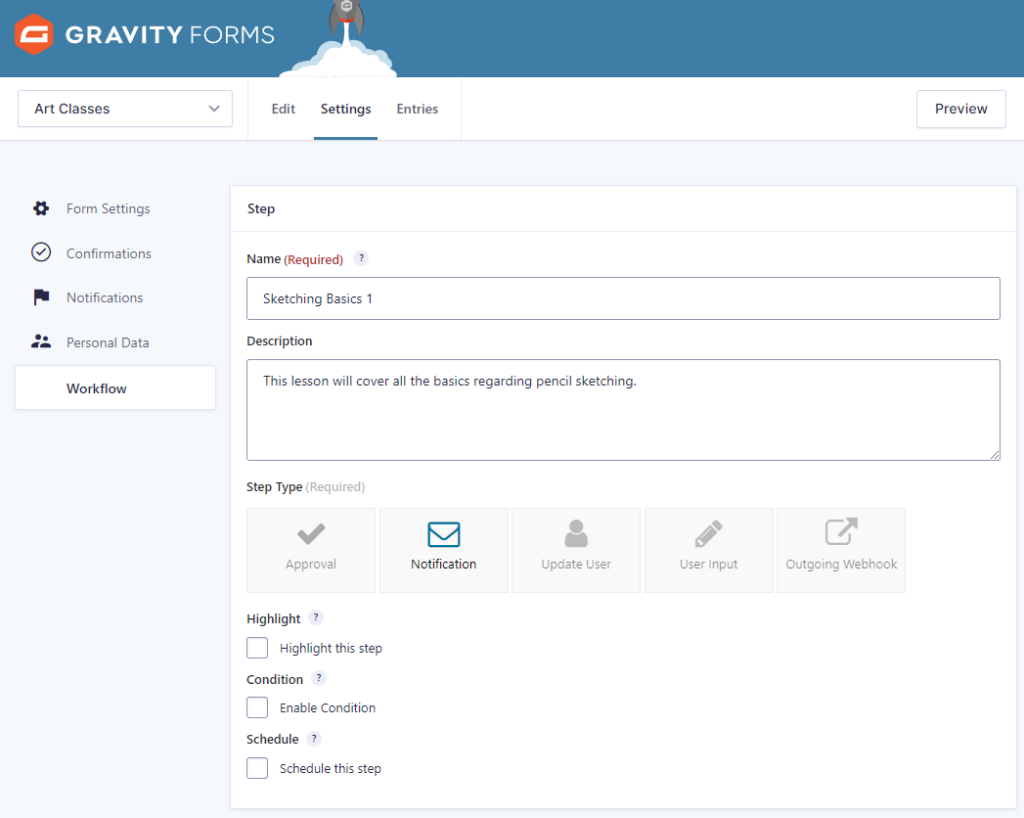
Next, select the Step Type from various options including Approval, Notification, Update User, User Input, and Outgoing Webhook. You can also choose to Highlight this specific workflow step by enabling the checkbox next to Highlight this step. Since we’ve selected the notification Step Type, it will automatically send all shop managers and administrators an email notification as soon as the user starts with their first lesson.
Depending on the Step Type you choose, your workflow settings might be different. In addition to this, you can also set email settings and decide the email sender’s name, email address, and the message you want to send with the notification. Make sure to click on the Update Step Settings once you’re done.
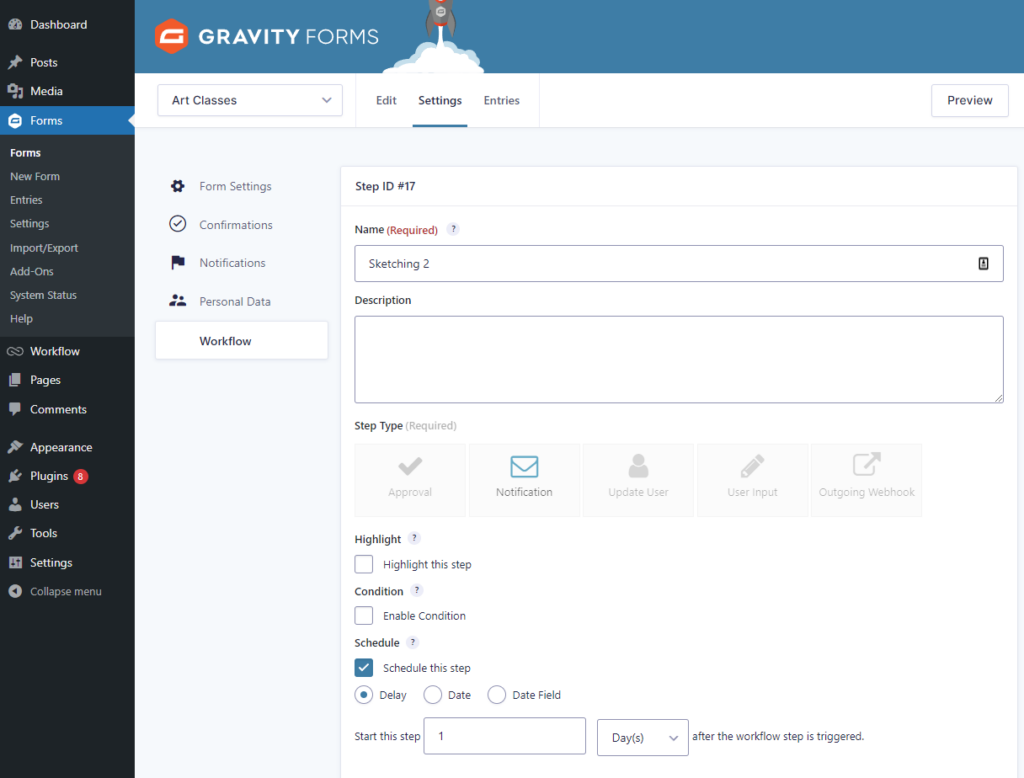
Additionally, you can schedule steps and delay sending notifications or allow users to consume the first lesson first and then give them access to the second step. Enable the Schedule Step checkbox and set a time you want to delay this step once it’s approved.
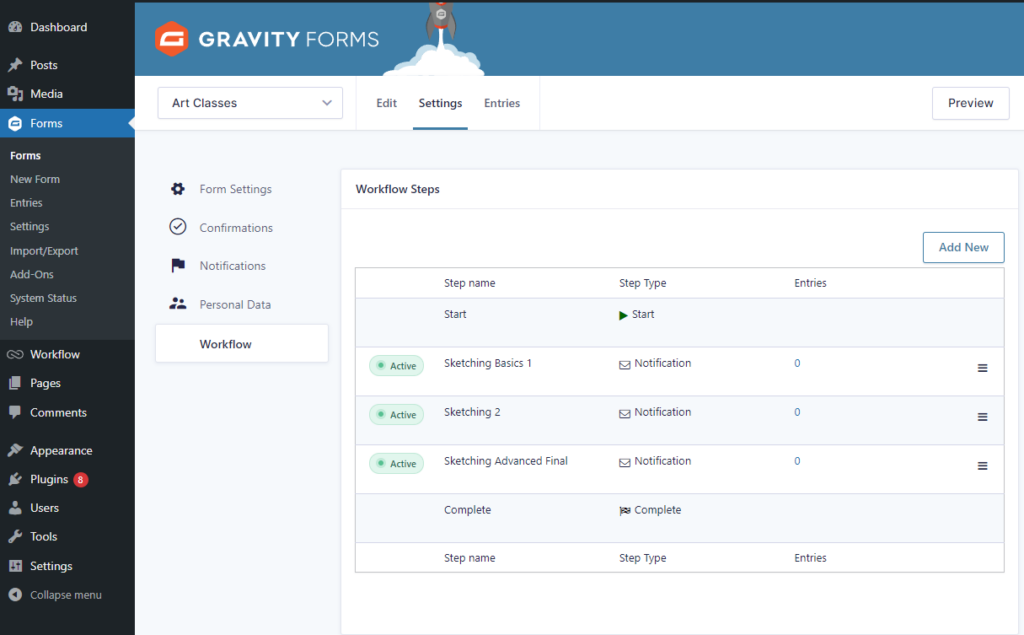
Similarly, you can create multiple steps for your Gravity workflow and create your drip content campaign as you wish. You can also drag-and-drop rearrange all of your workflow steps as needed and edit step information from this screen.
Bonus: Add custom messages to your drip content workflow
Gravity Flow recently added two new features that help display custom messages in your drip content workflow.
Set up a custom cancellation message
You can set up a custom cancellation message and potentially save your sale by displaying other content that visitors might be interested in. To do this, select the Approval from the Step Type section.
Under the Emails section, enable the checkbox next to Send email when the entry is rejected and add your email address and sending name, subject, CC, and BCC. you can also add a custom message and engage the user further by proposing a different offer.
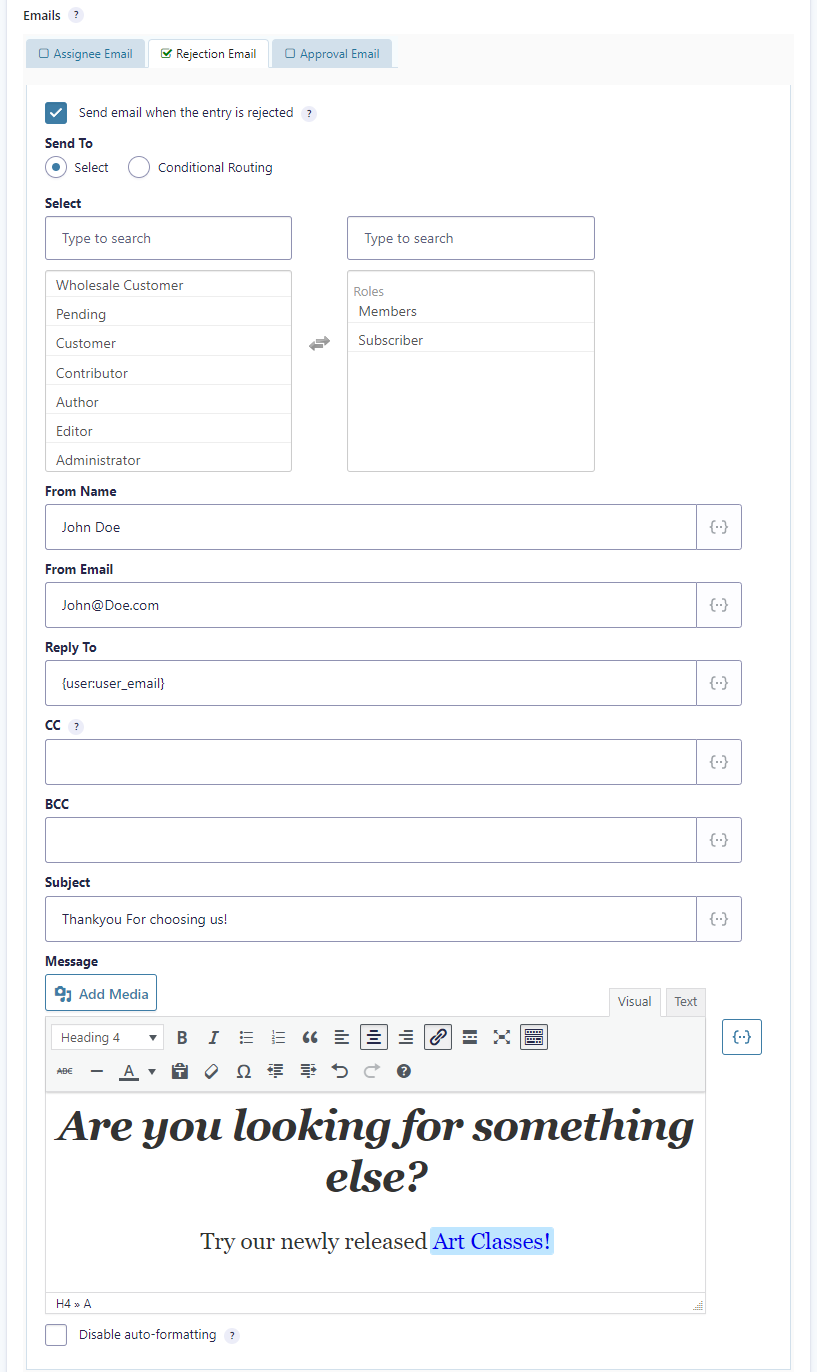
When a lead expresses disinterest, you can show them different content or a different product that they might be more interested in. This helps save quality leads and keep them engaged with your content.
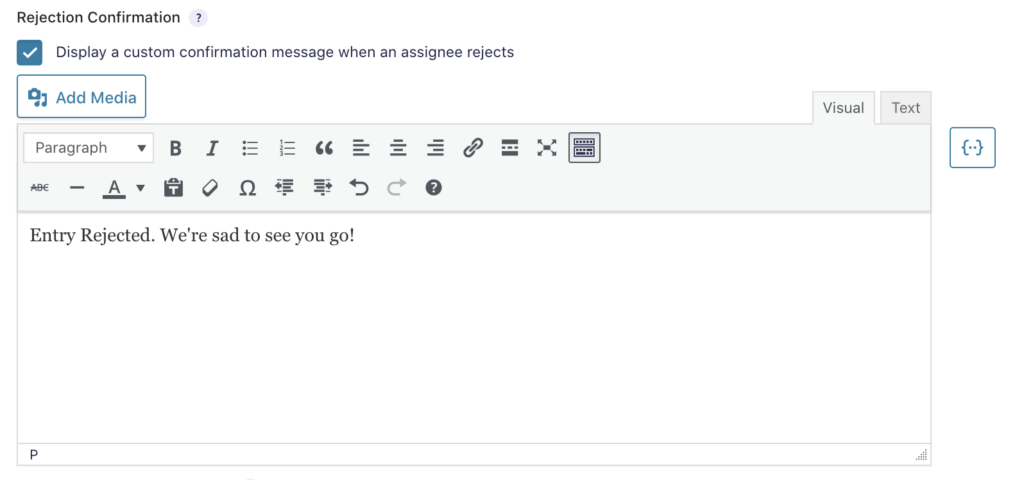
Display a custom confirmation message on approval or rejection
Gravity Flow also lets you display a custom message as soon as a user approves or rejects the drip content. To do this, select the Approval Confirmation checkbox and enter your custom message in the message box.
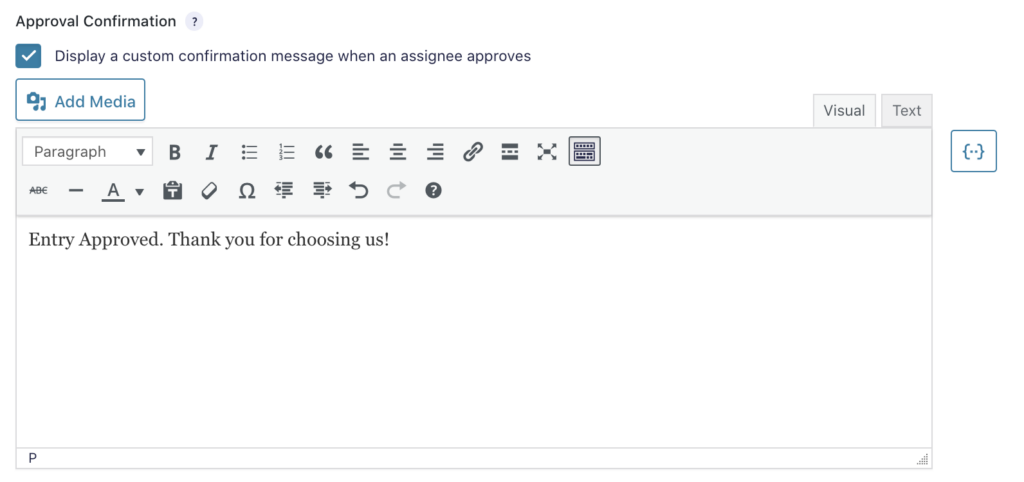
Similarly, you can also display a custom message as soon as the user rejects the drip content. This can be helpful in gaining back the interest of your valued user. Simply select the Rejection Confirmation checkbox and enter your custom message in the text box that appears on the screen. Once you’re done, make sure to click the Update Step Settings button to save changes and continue.
You can set up a call to action using the custom message on approval or rejection of the workflow step. This can be used to identify if the lesson was helpful and what can be improved for the future.
Creating an email course using Gravity Flow
Creating an email course yourself can be a daunting process as there are many small, tedious processes you need to overlook.
But if you’re using Gravity Flow, things can be much easier for you. For a more detailed explanation of how you can easily create an email course using Gravity Flow, check out our tutorial on how to create an email course using Gravity Flow.
The process is very easy and if you get stuck somewhere, Gravity Flow support is available every step of the way. In fact, you can reach out to the team at Gravity Flow if you need any assistance with your next project. Additionally, you can also use Gravity Experts if you want your next campaign to be created for you by experienced industry experts who know what they’re doing.
This can be a viable option for business owners who simply don’t have the time or skills to create successful drip campaigns themselves. This way, they can focus on creating premium content rather than be worried about creating a drip-content campaign.
Set up drip content in WordPress today!
Setting up drip content automation on your WordPress site is a great way to keep your audience engaged with your content and helps increase customer retention for your business.
Gravity Flow is a great plugin that can make your life easier by automating workflow processes that require a lot of time, labor, and money to do yourself. It’s a must-have for any WordPress site owner who is running a membership website, selling digital courses, affiliate marketers, and product companies who want to increase conversions.
Gravity Flow is constantly adding new features and updates that make the plugin more powerful and optimized. The team at Gravity Flow is always open to your suggestions about which features need to be added to the software in the future.
Ready to start adding drip content to your WordPress site? Get Gravity Flow today!
